The Real Problem (It's Not Your Design)
Most clothing brands die before they launch.
Not because the product was bad. Not because the market wasn't there. Because nobody could see it clearly enough to say yes - and the founder ran out of money waiting for a sample that would finally make it real.
Here's the question that nobody in this space wants to ask out loud:
"Is my clothing idea actually weak - or does it just look terrible in the way I'm showing it?"
Almost always, it's the second one.
You don't need a $3,000 photoshoot to look serious. You don't need physical samples before you can start selling. You need to know how to use apparel mockups - and you need to know the exact sequence that turns a design file into a brand that gets approved, gets pre-orders, and gets to market faster than competitors who are still waiting on production.
This is that sequence. Print it out. Pin it to the wall. Use it every time.
Before You Touch a Mockup - Get This Right First
This is the step every beginner skips. Don't.
Your design file needs to be ready before you open a mockup. If you skip this, you'll spend 3 hours fighting with a PSD trying to figure out why your graphic looks pixelated or misaligned.
File checklist - before you start:
- Format: PNG with transparent background. Not JPG. Not a screenshot. PNG, transparent.
- Resolution: Minimum 150 DPI for testing, 300 DPI for final presentation. Anything lower will look soft and unprofessional in the mockup.
- Size: Your graphic should be roughly the same size it will be on the actual garment. A chest print on a t-shirt is typically 28–35 cm wide. Scale accordingly.
- Software: You need something that can open a PSD file. Adobe Photoshop is the standard. If you don't have it, Photopea is free and runs in a browser - it opens PSDs and works for this purpose.
If you want to skip the setup entirely, this editable AI t-shirt mockup lets you place your design directly - no PSD experience needed.
How a PSD mockup works, in plain language:
You download the mockup file. You open it. Inside, there is a layer called "Smart Object" or "Place your design here." You double-click it, paste your PNG, save, close. The mockup updates automatically - your design appears on the garment with realistic lighting, shadows, and fabric texture.
That's it. The whole technical process takes under 5 minutes once your file is ready.
Step 1 - Validate Before You Spend a Single Dollar
Production minimums are brutal. 50 units. 100 units. Sometimes more.
And you're supposed to commit to that number before you know if anyone actually wants the product.
Mockups let you reverse this completely. You design, you show, you collect real feedback - then you produce. This isn't cutting corners. This is how professionals test before they commit.
The validation workflow:
- Take your design. Create 2–3 variations - different placements (chest, oversized front, back print), different base colors.
- Export each variation as a JPEG from the mockup.
- Show these to at least 10–15 people who are your actual target customer. Not your friends. Not your family. Real people who would spend money on this.
- Ask one question only: "Would you buy this, and at what price?"
- If fewer than 6 out of 10 say yes - you either have a design problem or a targeting problem. Find out which one before you spend anything.
NNGroup's research on prototype testing confirms that catching problems at this stage costs a fraction of what it costs to fix them after production. Apparel is no different.
What you're looking for: Not compliments. Price sensitivity and honest hesitation. That's the data that matters.
If you don't have a mockup file yet, grab a free apparel mockup template on CreativeStock.ai and have your PNG ready before you continue.
Step 2 - Build a Presentation That Gets a Yes
If you're showing one angle of one design on a white background and wondering why nobody is excited - that's why.
A presentation isn't one image. A presentation is a visual argument for why this product should exist. It needs to answer every unspoken question the person looking at it might have: What does it look like from the back? How does it fit? What does the print look like up close? Does it come in other colors?
What a complete apparel mockup presentation includes:
1. Front view - flat lay Clean, product-only shot. Works for e-commerce, ads, and any context where the product needs to stand alone. Neutral background. No distractions.
2. Back view - flat lay If your garment has a back graphic, a label, or any detail — show it. Leaving this out is amateur.
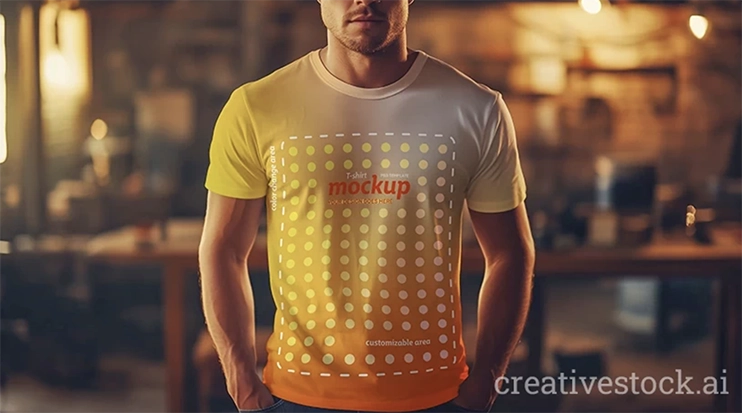
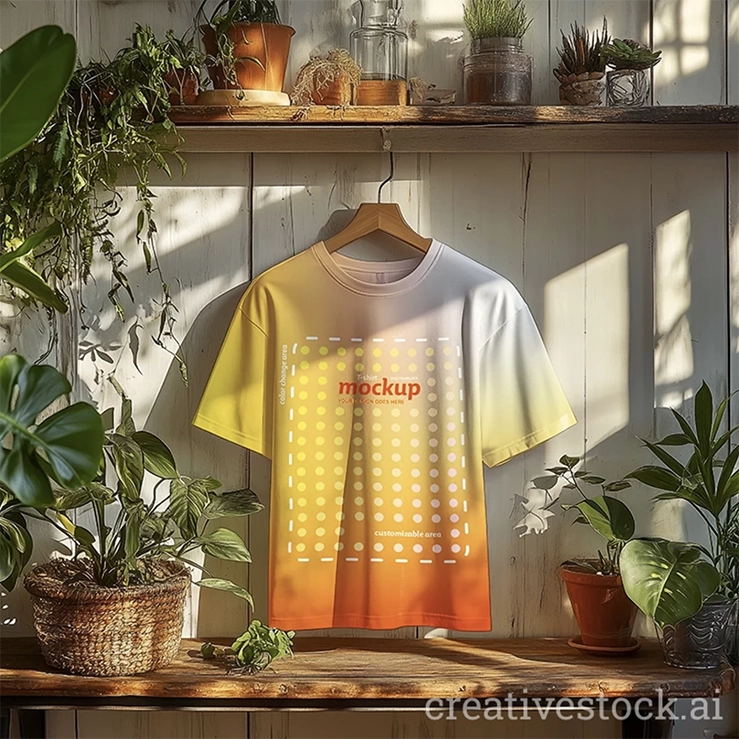
3. On-body / lifestyle shot This is the most important image in the set. It shows the garment worn, in a real context. It answers the question: "How will this actually look when someone puts it on?" Without this, you're asking the viewer to use their imagination. Don't ask that. Show them.
4. Detail close-up Embroidery, print texture, label, stitching - whatever makes your product premium, show it close. This is what separates a brand from a generic graphic tee.
5. Colorway spread All available colors, side by side. One row. Consistent lighting. This image alone removes half the "can you show me in black?" back-and-forth.
As Smashing Magazine notes in its guide to presenting design work, the quality of presentation directly influences how the work is judged - not just aesthetically, but in terms of perceived professionalism and trustworthiness. The same design, presented poorly versus presented well, gets fundamentally different responses.
The rule: Always present in context. Never in isolation.
Step 3 - Test Every Colorway in 10 Minutes
Color is one of the most expensive decisions in apparel production. Different dye lots, different minimums, sometimes different price per unit.
Most beginners make this decision based on gut instinct and then find out they were wrong after the order is placed.
You don't have to do that.
The 10-minute colorway process:
- Open your mockup PSD.
- Locate the base garment layer - in most mockup files, this is clearly labeled.
- Change the layer color using Hue/Saturation or by recoloring the layer directly.
- Keep your graphic layer identical across all variations.
- Export each color as a separate JPEG.
- Put all 4–6 colorways in one image, side by side.
Now you have a proper colorway deck. Show it to your validation group, your co-founder, your buyer - whoever needs to approve. Let them pick. You produce that one.
Not sure which base color reads best? Start with something proven - this stylish tee mockup is one of the cleaner neutral-tone options for testing contrast and graphic legibility.
This matters most for:
- Capsule collections - visual cohesion across pieces decides whether it reads as a collection or a random assortment
- Limited drops - wrong color = dead inventory you're discounting in 3 months
- Custom merch and brand partnerships - client approval always requires visual confirmation before bulk orders
Step 4 - Go to Market Before the Sample Exists
This is the step that changes everything. Read it twice.
Production lead times from most suppliers run 6 to 12 weeks minimum. Standard behavior: founder places order, waits, receives sample, photographs it, then starts marketing.
By that point, 10 weeks have passed. The launch window is smaller. The initial excitement is gone. The pre-launch audience they could have been building - doesn't exist. They're starting from zero with a finished product and no momentum.
The correct sequence is the opposite:
You place the production order. The same week - you start marketing. With mockups.
Here is exactly how:
Week 1–2: Build the pre-launch content library Using your mockup presentation set from Step 2, create:
- 6–8 social media posts (product shots, colorway reveals, behind-the-scenes of the design process)
- A landing page or simple link-in-bio with a pre-order or waitlist form
- Email sequence: 3 emails - announcement, social proof/validation results, final call
Week 3–6: Run the pre-launch Post consistently. Drive traffic to the waitlist. If you have any budget - run a small paid test ($50–100) to see which colorway and which image format gets the most clicks. This is cheap market research.
Week 7–10: Production arrives You now have a warm audience, pre-order numbers, and validated demand. You're not launching cold. You're announcing a drop to people who already said yes.
This is not deceptive. You are showing an accurate visual representation of the product. The mockup and the final garment will match - if you set up your files correctly in Step 0. Brands use this approach constantly. The only difference between you and them is that they learned this earlier.
The bottom line on this step: Every week you wait to start marketing is a week of audience-building you're throwing away. The sample doesn't need to exist for people to get excited about the product. The presentation needs to be good enough - and that's exactly what mockups are for.
The Mockup Types and When to Use Each One
Not every mockup works in every context. Using the wrong format in the wrong place is a subtle mistake that makes professional work look amateur.
Flat lay mockup Product-only, no body, usually shot from above or straight on. Use this for: e-commerce product listings, ads, and any context where the garment needs to stand alone without distraction.
On-body / lifestyle mockup Garment shown worn, often with a person or in an environmental context. Use this for: social media, brand decks, lookbooks, anything where you need to sell a feeling alongside a product.
Ghost mannequin mockup Garment displayed as if on an invisible body - structured, front and back visible. Use this for: wholesale presentations, retail lookbooks, B2B pitches. This format signals "we are a real brand with production-ready products."
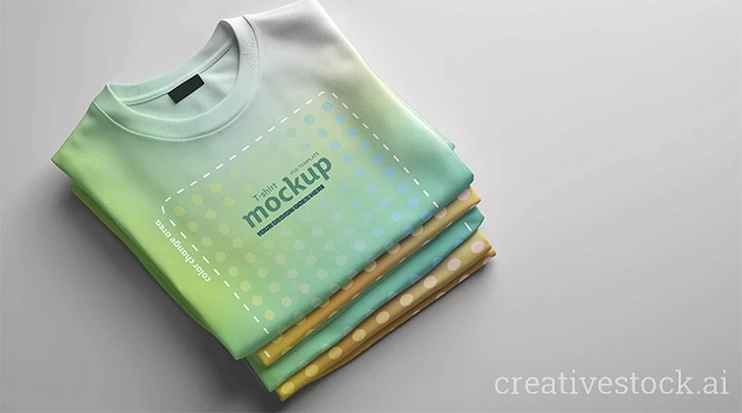
Folded / detail mockup Garment folded, often with packaging context. Use this for: premium brand positioning, limited edition drops, gift or retail packaging visuals.
The rule: Match format to context. An on-body lifestyle mockup on a wholesale PDF looks casual and unfinished. A flat lay on Instagram looks like a product catalog, not a brand. Know where the image is going before you choose which mockup to open.
This Is the Whole System
You don't need more money to launch faster. You need a better sequence.
Validate the design before you produce anything. Build a presentation that answers every visual question before it gets asked. Test colorways digitally, not in production. And start marketing the moment you place the order - not the moment the sample arrives.
The brands that move fast are not the ones with bigger budgets. They're the ones who figured out that a well-made mockup presentation closes the gap between idea and yes - faster than anything else in this process.
Your design is not the problem. How you're showing it probably is.
Fix that first.